Our Design Process
We used design thinking methodologies taught by the Hasso Plattner Institute of Design at Stanford (also known as the "d.school") to create our prototype. This method includes understanding & observing, creating a point of view, ideating, prototyping, and testing.
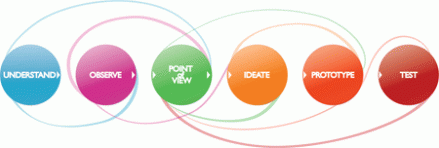
Source: http://www.hpi.uni-potsdam.de/d-school/design_thinking.html
Step 1: Understand
The first step of the design process is to observe and understand. To do this, we conducted interviews with members of the YTEP program at the SF Mission Credit Union. These interviews were aimed to understand the kids' spending habits, their current sources of income, their interests and hobbies, and their future goals and aspirations. These interviews helped us gain a solid understanding of their lifestyle and culture and how they and their peers currently handle money.
Our interview questions and responses can be viewed here:
Our interview questions and responses can be viewed here:
| final_interview_questions_ytep.pdf |
| ytep_interview_notes.docx |
Step 2: Point of View
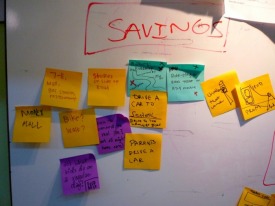
Upon completing our interviews and synthesizing our findings, one huge insight that came up was that for our product to be successful, whatever we would make, would have to be engaging and relevant to the kids' lifestyle and habits. Our competitive analyses of the current marketplace of financial literacy games for children also revealed that the online games without relevance to their lives were most prone to fail. On the same lines, our solution would have to teach them concepts that are most relevant and useful to them. From our interviews, the 4 most important topics that kids need to know include: the difference between wants vs. needs, savings, budgeting, and future-planning.
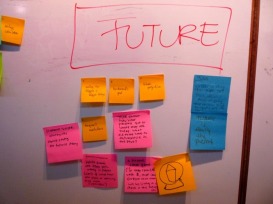
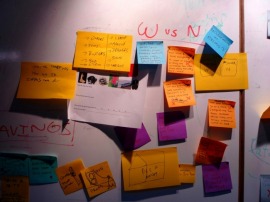
Step 3: Ideate
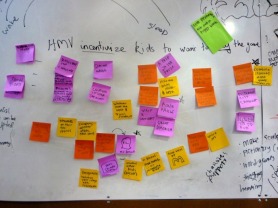
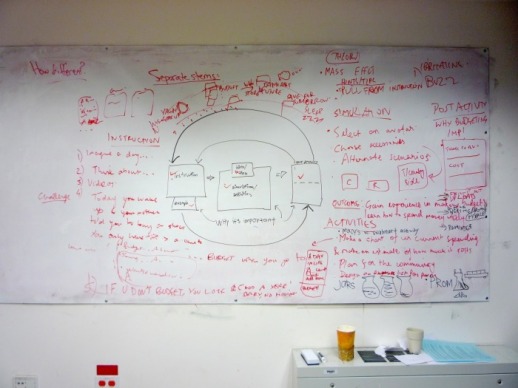
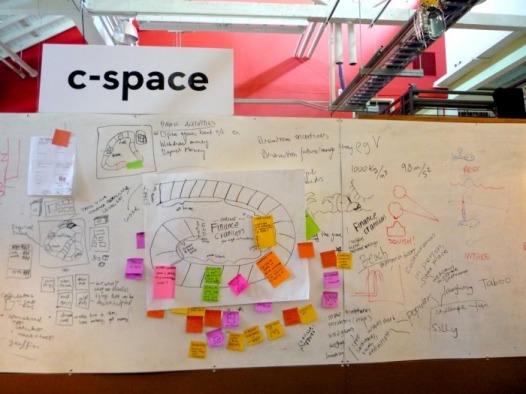
We brainstormed ideas of how to teach kids each individual concept by using d.school techniques of brainstorming sessions with post-its and "How Might We" questions. We then also derived an instructinoal framework for our game design, and then consolidated our with whiteboard sketches using the ideas we gathered from brainstorming sessions and putting them into place with our framework.
Some "How Might We's" we tackled included:
How might we incentivize kids to want to play our game?
How might we make the tie between the online simulation and the board game more explicit?
How might we ensure our game will be engaging to the kids?
Eventually, we decided to use a typical day in a life of a high schooler as the framework for our game, reason being that since our target users are high schoolers, we felt it would be most practical to simulate a typical day of their life and the financial decisions they have to make. We felt this would be most relevant and engaging for them.
Post-its:
Whiteboard sketches:
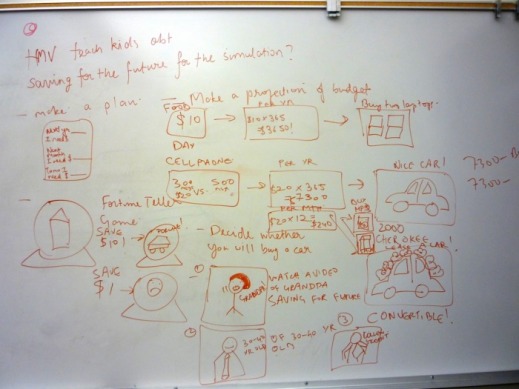
Board game brainstorm:
For all images, visit: http://bit.ly/showmethemoney
Step 4: Prototype
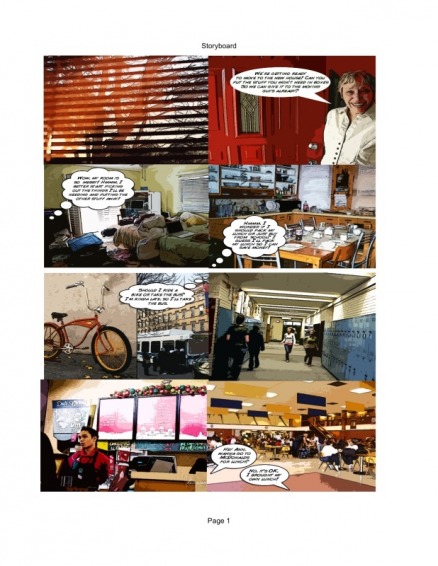
The next step in our process was to prototype. We first drew storyboards to depict the flow of our game and the financial decisions kids will encounter throughout their day.
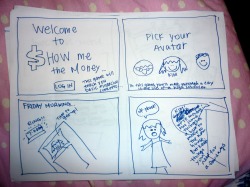
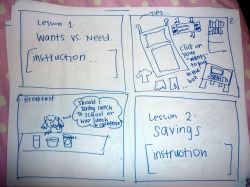
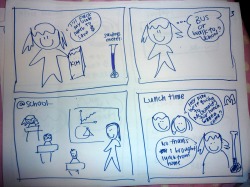
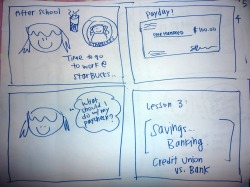
Afterwards, we created our finalized illustrated storyboards that we used at our "prototype show and tell."
Along with the illustrated storyboards, we also brought in a prototype of our board game for the show and tell:
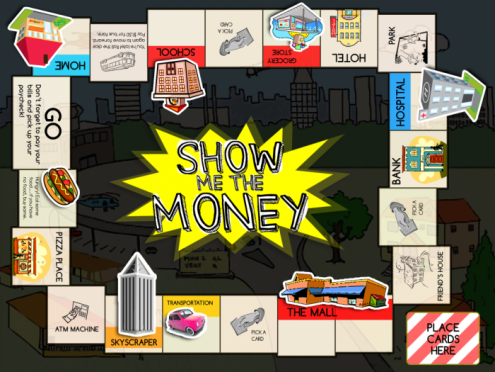
The idea of the board game is that upon completing the simulation, kids would then be able play this board game with their friends. The board game starts out with a budgeting sheet that requires kids to fill out first. Kids are then allotted a certain amount of money at the start of the game based on their set income. Each loop of the board game represents one week in the life of a high schooler. As kids go around the loop, they have to make decisions about what they want to do at each location they land on (i.e., the mall, the pizza place, hospital, etc.) If they decide to purchase something, their expenses are recorded on their budget sheet and each transaction is recorded. The objective of the game is to see who has both the highest difference between their budget and the amount they spent over a period of two weeks while achieving a certain level of happiness.
Step 5: User Testing
We tested our board game with 8 students at College Track, an after school college-preparatory program in East Palo Alto. We then used a contextual inquiry protocol and asked participants to play our simulation while thinking out loud and narrating their thought processes. Upon completing the simulation, participants were asked follow up questions regarding what they thought of the game in regards to the content, aesthetics, personal relevance to their lives and usability. Participants were compensated with Jamba Juice gift cards. Participants were also asked to sign a consent form letting them know that anything they tell us will remain anonymous.
From our usability testing, some minor interface issues were raised, including improving the audio quality, making it more explicit who the voices of the characters in the game are, and lengthy instructional videos with too much audio that need to be accompanied with more visuals. More sound effects or some light background music would also be favorable to make the game more interesting. Kids commented that they felt their friends would also be interested in playing the game because they thought the simulation would provide them with useful knowledge.
We also conducted user testing with kids during our "prototype show and tell" session. From this session, we gathered that kids really want to be able to customize the game to their lives - which included things like being able to choose an avatar that they related with, name their avatars with their name, and being able to choose the setting of the game (i.e., large city, suburban town, etc.) depending on where they live.
See the Solution page for our final prototype.
